Tonight, I decided to finally make some ravioli. We got a ravioli cutter a week or so ago… and I’ve been meaning to use it.
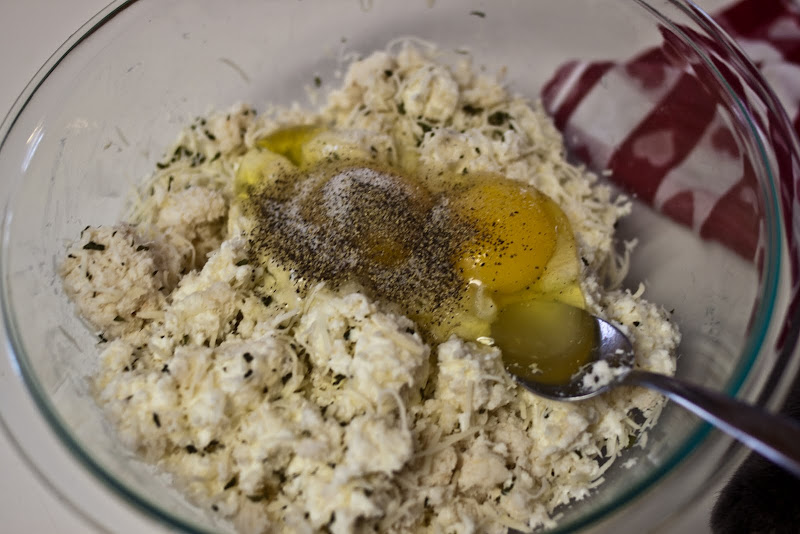
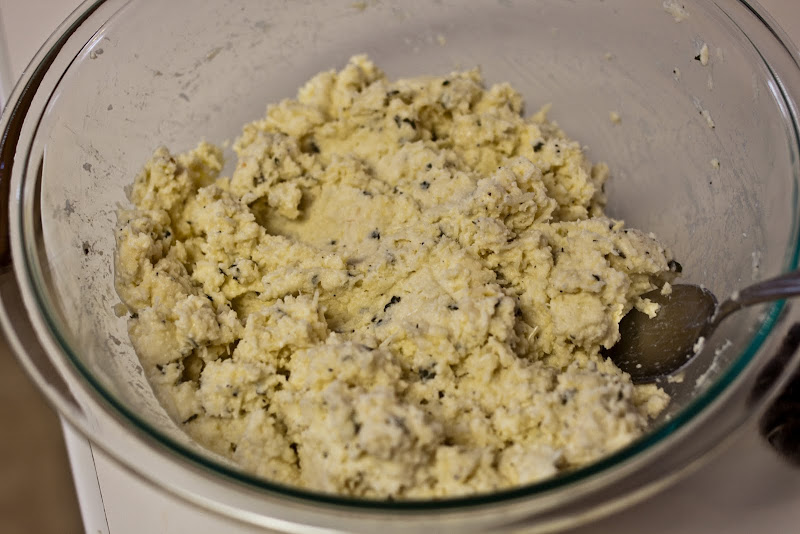
Step 1: Make the filling. I used 12oz of crab meat, 15oz of ricotta cheese, 8oz of mozzarella, 2 eggs, salt and pepper, and a bit of parsley.
Mix all of that up until everything is evenly blended and distributed. It’ll look like so:
After the filling is made, put it in the fridge and let it stiffen up a little bit. Meanwhile, it’s time to make the pasta.
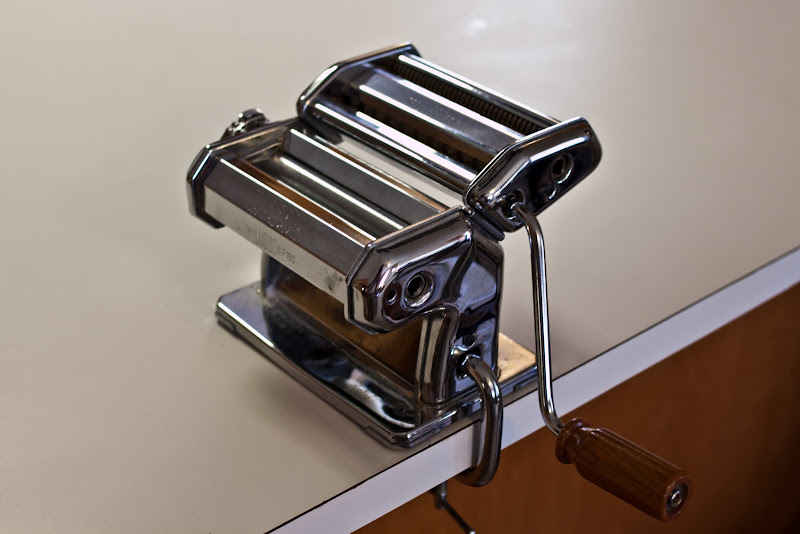
This makes the magic happen:
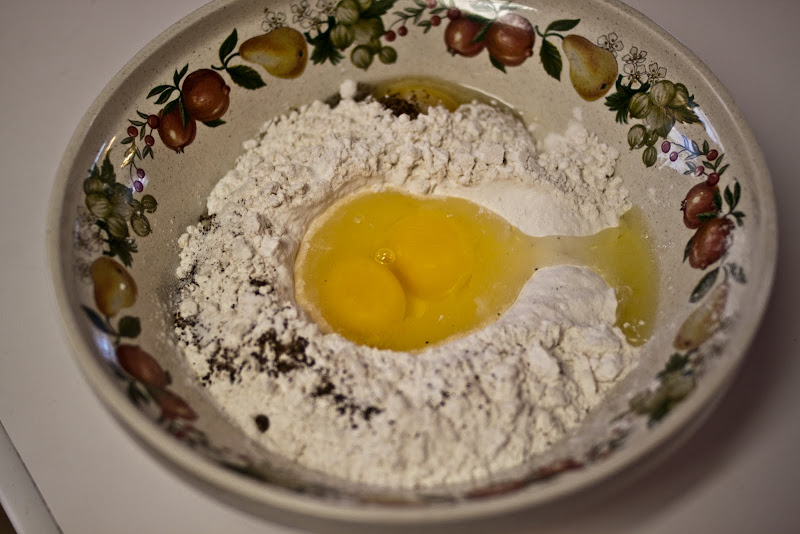
The pasta dough is the simplest thing to make in the world. 2 cups of flour, 3 eggs, and a bit of salt.
You can start mixing in a bowl… or, my dad traditionally doesn’t measure anything… just take a pile of flour on the counter, cracks a few eggs into the center of the pile, and mixes until it becomes dough. Really, that’s the basic idea… when you start mixing things up, the flour will stick to the flour that it needs… it’s damn near impossible to get too much flour in the mix, because the egg will only support so much… if you get a pile of dry looking crumbles, you can add a bit of water, or if you’re awesome like me, you just add another egg and keep mixing… if it’s too wet, add more flour. It’s not rocket science. Oh… and mix with your hands. It’s a little messy… but you won’t melt.

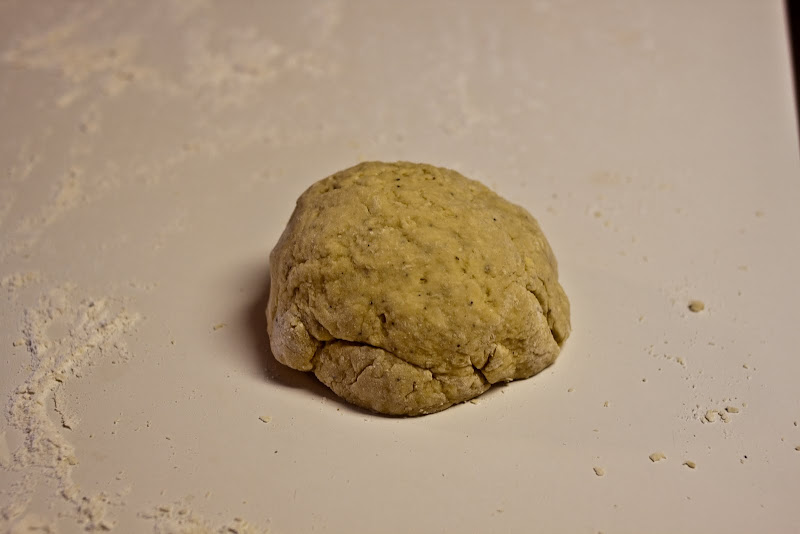
Once it starts to form up, pull it out of the mixing bowl and place it on a floured counter. You’re going to use a lot of flour… some in the mix, and some on the counter. Well, a lot on the counter. You don’t want the dough to stick to anything while you’re mixing it. Once the dough is holding itself together, you can knead it for a while longer, then let it rest for about 2-3 minutes.
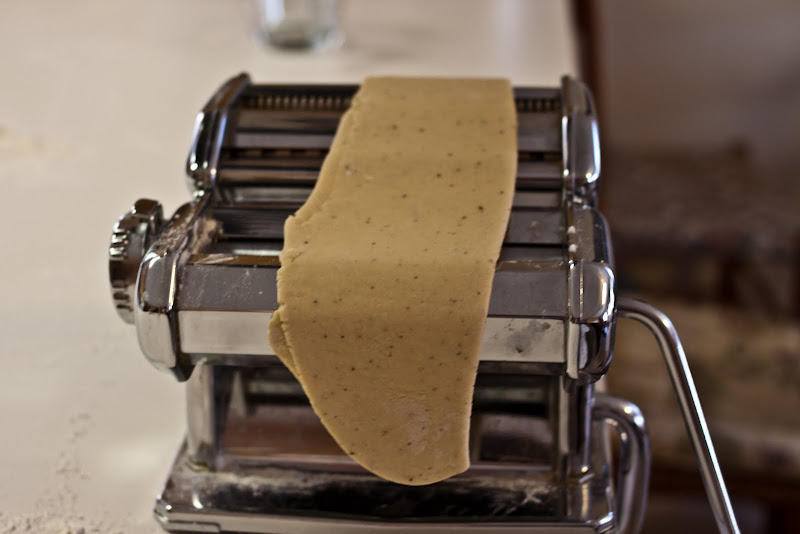
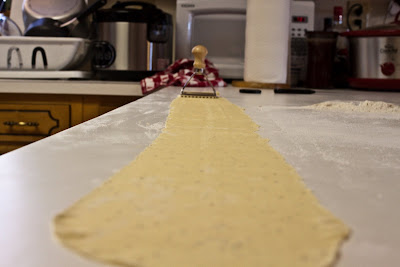
Here’s my dough, ready to start going through the machine.
You don’t have to use a rolling pin at any point. Just break up the dough into baseball sized pieces, pound it as flat as you can with your hand, and then starting at the widest setting on your rollers, start rolling it through the machine. You can fold it back and forth lengthways and width-ways a few times to let the machine do a little bit of final mixing for you. Now, for ravioli, you don’t want to go quite as thin as you would making spaghetti or vermicelli. I leave the roller set about 2 clicks out from where I do vermicelli, which is 1 click out from spaghetti. (Vermicelli, I do at the thinnest setting). Once you have it rolled out, place it on the floured counter.
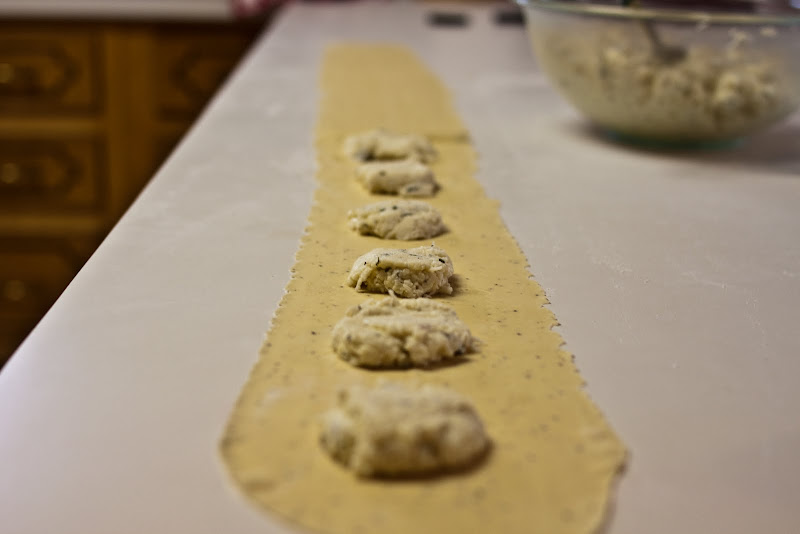
Now, it’s time for the actual making of the ravioli. Take the pasta sheet, fold it in half and push at the top and bottom to make a visible indication of the “center” of the dough. Once you have the center, take a damp paper towel and wipe the top of the pasta from end to end. A little moisture on the surface (and lack of flour) makes the dough stick to itself when you press it, then cut it.
Lump the filling on the dough in proper sized spacing. If you need to, use your ravioli cutter to figure out your spacing. Then, fold the dough over at the center point and cover the filling. Starting at the fold in the dough, work your way forward and then around the edges of the filling, then around the front of one / back of the next. The goal here is to work out the air bubbles that would be trapped in the ravioli. Trapped Air + Boiling Water = pot full of ravioli filling and empty ravioli.

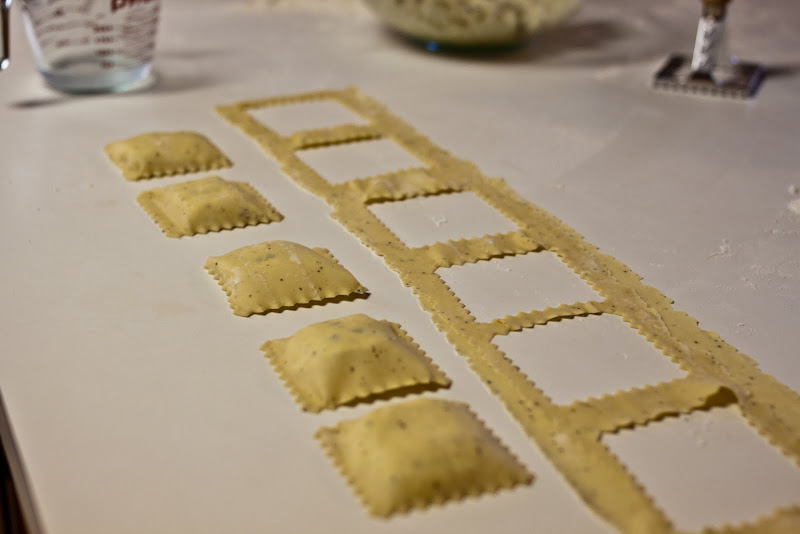
So, After you have the air pushed out, and the soon to be edges pressed against each other, you’re ready to cut your ravioli. If you don’t have a ravioli cutter, you can just as easily use a juice glass, as long as you flour the rim of the cup so the dough won’t stick. Then you just keep repeating. The leftover dough from each cut can be balled back up and run through the machine again. Add more dough to it, and it’s your next batch, ready to go. However, don’t let it sit too long, or it’ll get too stiff, and you won’t be able to work with it. It’ll crumble and fall apart. To keep the dough in good shape when you’re not working with it, put it in a glass bowl, and put a damp towel over the top of it.
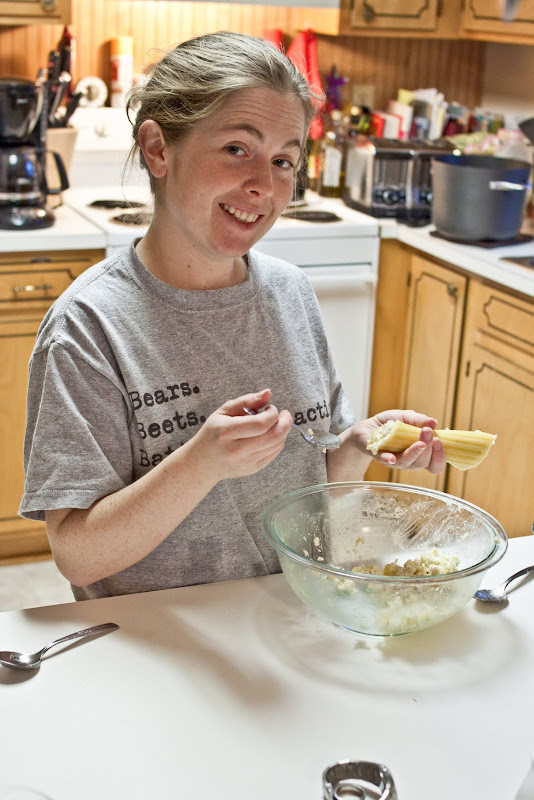
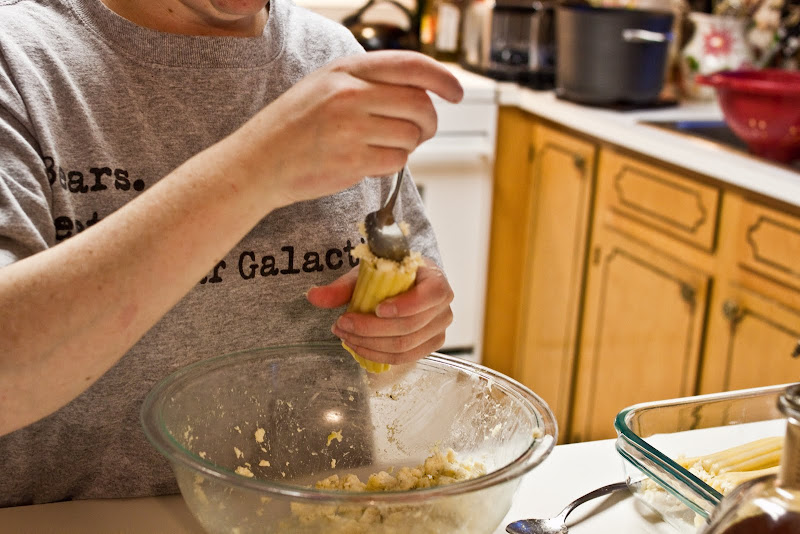
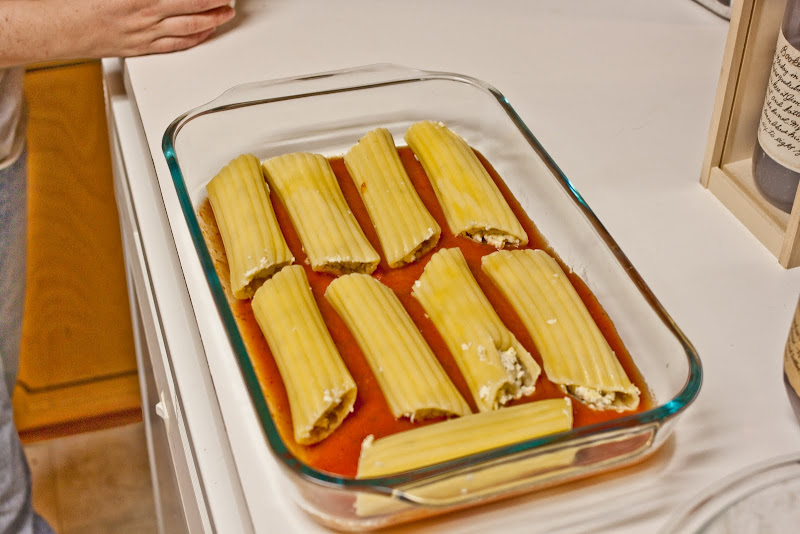
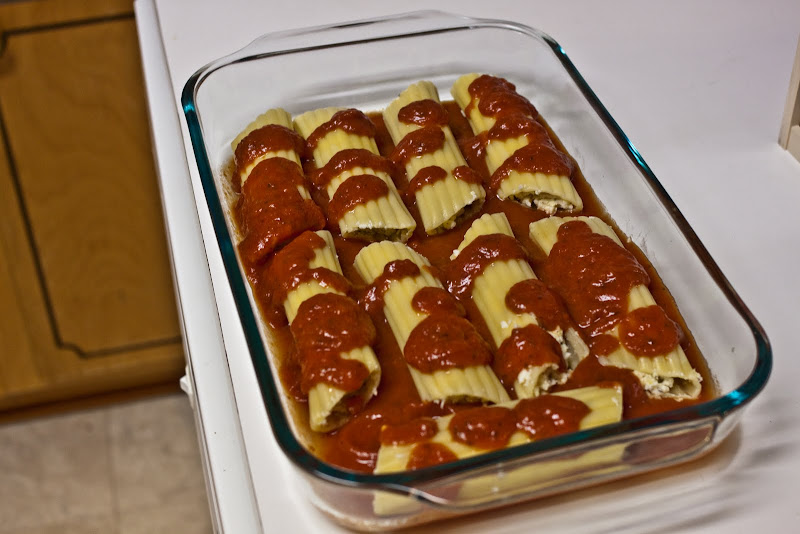
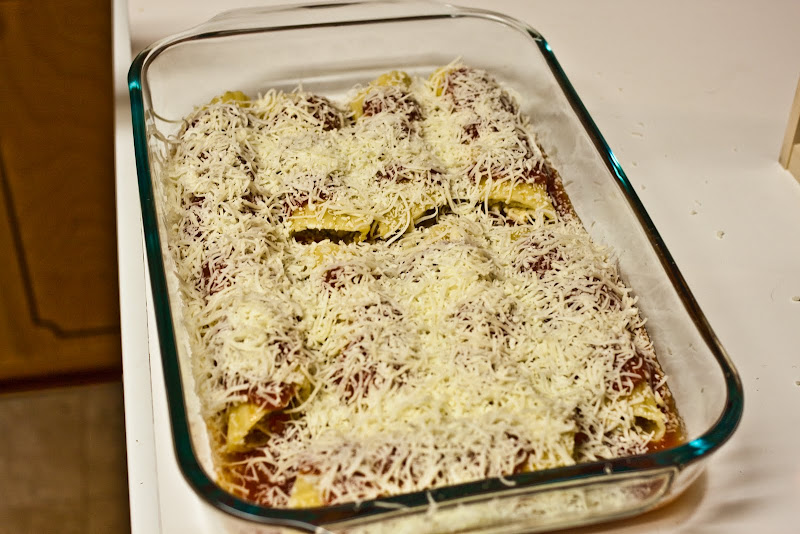
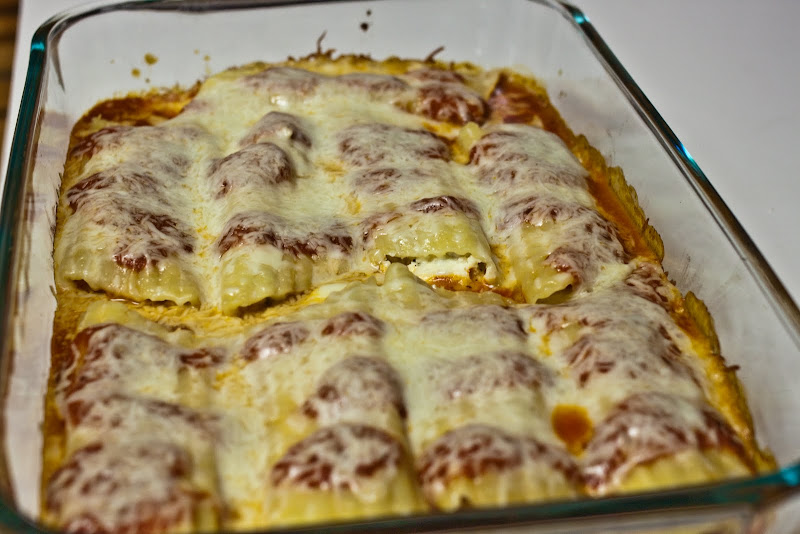
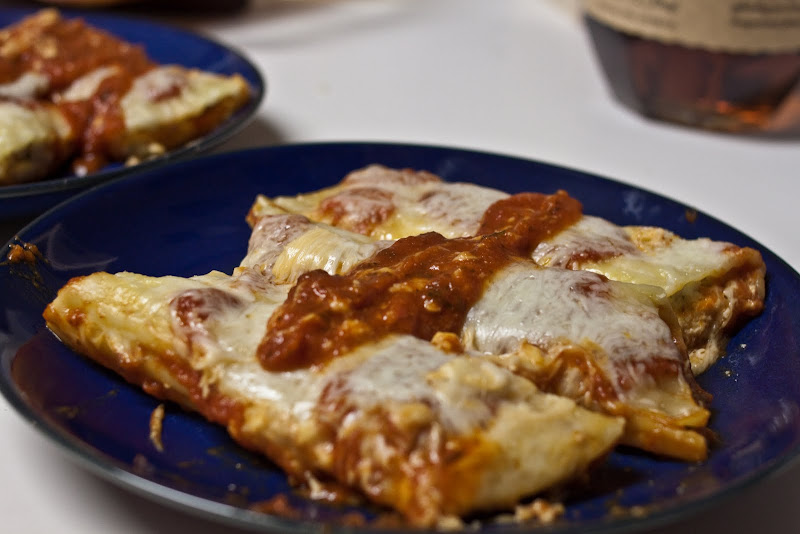
So, you’ve made a bunch of ravioli at this point, and like me, you probably have a lot of filling left… unless you’re making ravioli for 2 dozen people. So, you can use the extra filling for stuffed shells, stuffed manicotti, or a mini lasagna. Once your ravioli is stuffed, you can either cook it immediately, or put it in the fridge for a little bit if you absolutely have to. But, I’d recommend you cook it immediately.
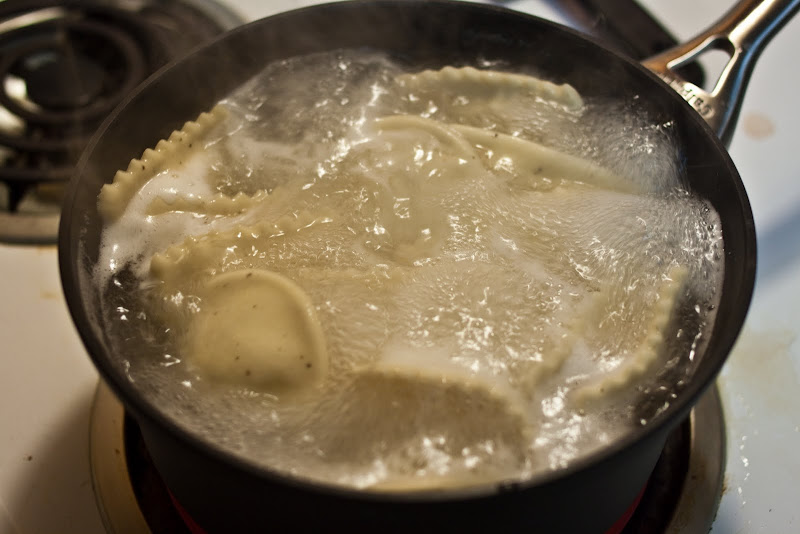
Boil water. Add a bit of salt to the water and a little Extra Virgin Olive Oil (to keep the Ravioli from sticking together) and boil for about 5-7 minutes, depending on how big you ravioli are, and how thick your pasta is.
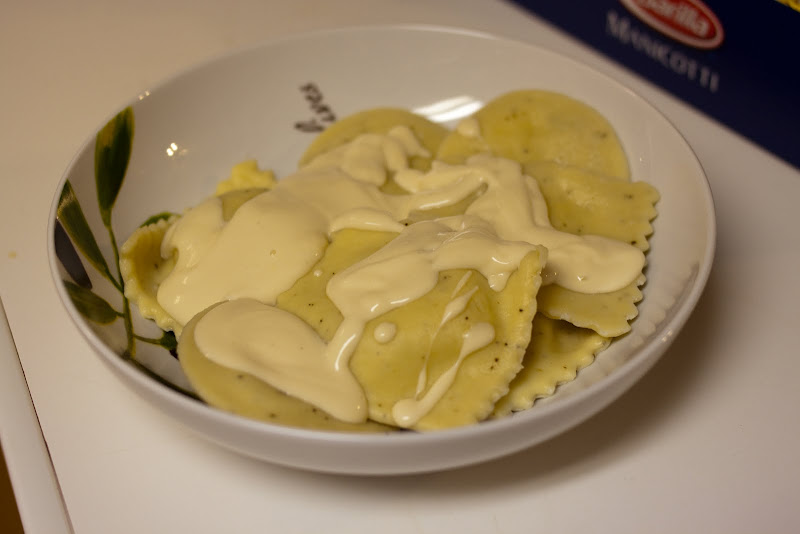
We paired our crab stuffed goodness with a Garlic Alfredo Sauce, and a bottle of Gewurztraminer wine. Tasty, tasty stuff. You can add spinach, or any number of odd things to the filling, but with any leafy veggies, make sure the leaves are dry. Otherwise, the filling will become watery, and we don’t want that.
There will be about a week break in the cooking blog. Virginia is going on “Alternative Spring Break” and I’m going on “Real” spring break. So, we’ll catch you when we get back.