About the cooking blog...

We enjoy a good meal. 99 out of 100 times, this good meal takes place in our kitchen. We don't eat out very often, and when we do, we're rarely "wow-ed" by the food we get. The following are recipes that have passed through our kitchen. They're not always winners, but we'll tell you if they're not, and what should be changed to make them better. Enjoy!

Saturday, December 22, 2012

Well Fudge it.

As a little break from making cookies today, I made some fudge…. Cause why not?

So… here’s what you need to make some awesome fudge.:

  • 3 Cups sugar
  • 3/4 cup margarine (1-1/2 Sticks)
  • 2/3 cup evaporated milk
  • 1 – 12oz bag semi-sweet chocolate chips
  • 1 – 7oz jar marshmallow fluff
  • 1 cup chopped nuts
  • 1 tsp Vanilla extract

Take this ^ …

This ^….

and this:

and put them into a 2-1/2 quart saucepan over medium-high heat. Stir until it comes to a rolling boil, then continue to stir for another 5 minutes while it boils furiously.

Meanwhile, you should have your sous chef prep everything else….

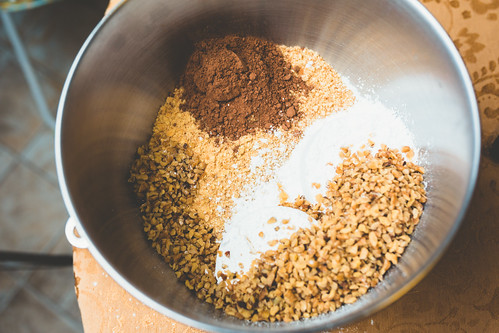
Toss this stuff into a mixing bowl.
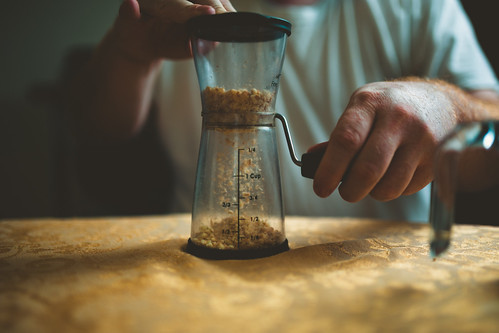
Chop up some nuts…

toss those in the mixing bowl also.

Go ahead and toss your vanilla in there as well…. now, you just wait on the stuff on the stove…. by the way.. let’s see how that’s going….

Note, while it’s boiling, and you’re stirring, it’s going to grow… it might be a little foamy on top… and it might try to jump out of the saucepan… so.. you might have to turn the heat down a little bit, while still maintaining a boil.

After it’s been boiling for 5 minutes, pull it off of the heat, add your bag of chocolate chips, and continue to stir for a while longer, until they’re all melted and mixed in…

Note: They won’t want to mix in at first… it seems like step one is for them all to melt and form a blob on the bottom of the saucepan. This blob will have the consistency of a thick drywall mud. The melted margarine won’t want to play nice until the chocolate gets a bit hotter and meltier. (<—not a word, don’t care)

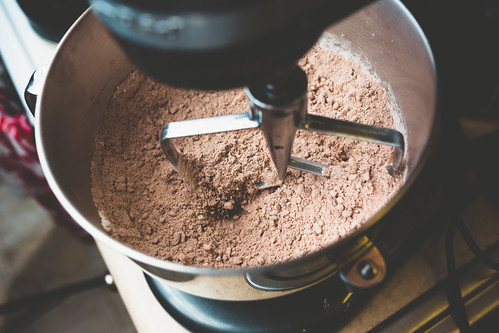
At this point, you can dump the hot stuff in with the cold stuff, and turn the mixer on.

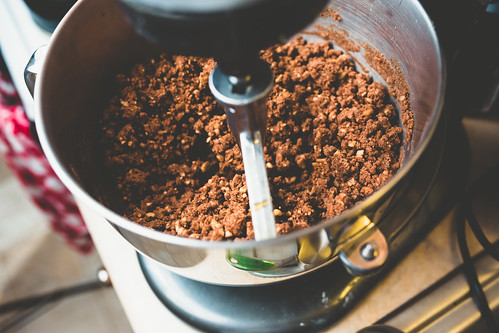
Let it mix for a little while, but be aware.. as you mix, you’ll be losing heat, and making it harder to work with.

After it’s all mixed up, put it in a greased 9x13 pan and try to spread it around semi-evenly.

Now… just let it sit there…. and try to keep your dirty little fingers out of it…. It'll probably take about an hour or so, depending on how cool you keep your house.

Here’s your finished fudge….it’s… awesome.


Here’s the deal. You can do whatever you want with this recipe for the most part… don’t like nuts? Don’t use them… Want to add Marshmallows? go ahead. Do it. See if I care. …. Don’t like this kind of chocolate? Use white chocolate. Use orange chocolate. Use dark chocolate. Use bacon grease…well.. bacon grease might not work too well…. but you get the idea.

Gingerbread!

My only previous experience with gingerbread was of the structural type. The stuff you use for making gingerbread hoses is more like Medium Density Fiberboard than an actual food product.So, when I went looking for a gingerbread recipe, I went looking for a good soft one…. So.. here we go.

First, you need 3 sticks of softened butter.

Then, 1 Cup of brown sugar.

Mix those together until it’s a smooth sugary buttery concoction.

Once they’re mixed up, toss in 2 eggs.

and mix them in…..then, add 1 cup of molasses.

and mix well…..

Next, it’s time for the spices.

3/4 tsp salt, 1 tsp cinnamon, 1/2 tsp ground cloves, 2 tsp ginger.

Mix all of that in… then it’s time to start adding flour. This recipe called for 5 cups of flour, which seems like a lot, but the structural gingerbread took closer to 7-8 if I remember correctly.

It' might take a minute to mix up… so be patient.

So, at this point, I had finished the recipe, and went ahead with the rest of the directions, Even though I suspected that the dough was a bit thin, I got to thinking about the time it was going to spend in the fridge, and the fact that it would be rolled out onto a floured counter-top.

So, at this point, the recipe says to break the down down into about 4 pieces, beat them reasonably flat, wrap them in plastic, and put them in the fridge.

So… the next morning, I pulled the dough out and got things ready….

I put out wax paper and a bit of flour, and got to rolling….

to:

So… now, we’re ready to cut out some shapes…

Here’s where we ran into a problem. If I would have been able to cut the dough as soon as it came out of the fridge, it would have been fine. However, the time out of the fridge, and rolling it out made it a pain in the ass to work with. It was too soft, and stuck to the floured rolling pin and the wax paper. My guess is that the dough was far too wet, and was picking up all of the flour I had put down on the wax paper.So…. we ended up with this:

So… shapes are pretty and all.. but that would have required putting the dough back into the mixer, and adding more flour until it was right, then back in the fridge for a few hours again…. So instead, we got regular, round cookies.

Next step, was some quick icing.

You need one egg white… toss the yolk away.

1 tsp Grand Marnier

1-1/2 cups of powdered sugar

Then whip it…. whip it good.

Then, you just have to ice them.

Pecan Cookies!

So here is my contribution towards Christmas cookies. We made a batch of these and I took some to work.

I like these because they are easier to make than the more traditional pecan tassies (those little mini pecan pie cookies). Also because the base of the cookie is a sugar cookie instead of a pie crust they are really sweet and yummy. 

So make you have lots of brown sugar on hand before you start this. Also you probably want to chop up some pecans. Other than that, this recipe is super easy and delicious.

Here’s the recipe that I used: http://yumsugar-blog.onsugar.com/Pecan-Pie-Cookies-806354

Here are Aaron’s beautiful pictures:

Be sure your butter is softened before you get started.

Cream together butter and sugar with vanilla.

Then add your flour and baking powder. When you finish it looks like this.

Then you roll the dough into balls.

After you have your balls made, just put a thumb-print indent into them. So there’s a little “bowl” shape.

Mix your chopped pecans with the brown sugar, vanilla and whipping cream.

Then spoon your pecan “filling” into your bowls and bake.

You end up with a nice chewy sugar cookie with an awesome pecan pie-style topping.

Merry Christmas!

Monday, December 17, 2012

Bourbon Balls!

We’ve started making Christmas cookies. Last night was the first run, and we made two types… Since I made the bourbon balls, we’ll start with those.

First off, you need to mash up 3 cups worth of ‘Nilla Wafers.That’s a whole lot of Nilla Wafers.

I was using a nut grinder/chopper thingie…. It worked decently well, but as I was doing it, I realized that I should have been using the food processor. For that matter, they should sell this stuff in bags, like flour, in the baking section.

Self Portrait grinding 'Nilla Wafers

You’ll see below that there’s a different box in the background… yeah… that’s right… it took one entire box, and about 3/4 of a second box in order to get 3 cups.

So, once you have smashed your Nilla Wafers, it’s officially time to get started.

Bring out the mixing bowl and you’ll be done in a few minutes.

Add 1 cup of chopped pecans or walnuts, 2 cups of powdered sugar, and 1/4 cup of cocoa powder.

Then, 1/4 cup of corn syrup (the recipe calls for light, but dark does the job equally as well)

Then, add 1/2 cup of your favorite bourbon. Here’s a note… since these don’t get cooked, choose a good bourbon. It doesn’t get cooked off, and you can taste it rather strong.

Hooch for the Bourbon Balls.

Now, you can start to mix things up… it’ll be a little dry at first… but keep on mixing, and it’ll start to form up.

Then

Then finally:

BAM. Look at that gorgeousness.

So now, you pull the dough out in little pieces, and roll it into about 1 inch balls.

After you form them up, roll them around in some leftover crushed Nilla Wafers, or powdered Sugar… this is mainly just to keep them from sticking to each other.

Bourbon Balls covered in crushed 'Nilla Wafers.

Powdered Sugar Bourbon Balls

Now, toss them in the fridge… and they’re done…


That was easy right? Well… there are a couple of notes… it’s kinda difficult to get the mixture just right.. you want it dry enough that it won’t stick to your hands, but wet enough where it’ll stick to itself nicely.

Starting off, my mixture was a little dry, so when I rolled the balls, they would split in the center and fall apart.So, it went back onto the mixer and got more bourbon added… Then, the consistency was right…. for a little bit… then, as you work, they’ll dry out a little bit… so you may have to add more bourbon again… so… moral of the story.. if things get dry, just keep adding bourbon, a little at a time….


I’m a bag fan of these.. they’re easy to make, and pack a good little hit of booze.