Seriously. Some readers of the food blog may want to look away and just skip this update.
Today’s project is: Buffalo Wings.
Now, those that know me well know that I don’t play around when it comes to Buffalo Wings. I’ve gone to more than a few reputable wing places and laughed in their faces when they presented me with “The hottest thing we have”… So, a few years ago, I started making my own wing sauce. Up until today, my recipe has been a secret because I never really make it the same twice. The ingredients are normally similar from batch to batch, but I never really paid attention to the measured amounts of things I put in. But, I owe some people a recipe for this so you can start punishing yourselves at will.
However, I’ll re-iterate. This recipe isn’t for the people who order mild wings. This recipe isn’t for the people who order the “Hot” wings at restaurants and are sweating by the time they finish a basket. This recipe is for the folks who have won every T-Shirt in every wing eating challenge and are looking for something that’ll step up their game. The people who use pepper spray as breath freshener. *** If made indoors, this sauce will turn your once friendly kitchen into a CS gas chamber.*** (I got to make it inside because Virginia is at work… if not, I’d be making the sauce outside on the side-burner on the grill)
Without further ado…. here comes the pain.
This recipe is for a small batch, the yield will be just over a cup and a half. For more sauce, increase the amount of everything going in.
First, there’s a bit of prep work. We’ll be smoking the Habaneros on the grill, so we need to get our chips ready. I use applewood chips, and they need to soak for about a half an hour before you want to use them. After they’ve soaked, make a few packets of chips in aluminum foil and poke a few holes in the top for the smoke to escape. Place the packets directly on the heat transfer plates on the grill’s outer 2 burners (the plate directly above the burner… if you place the packets on the grilling surface, they won’t get hot enough to smoke) This will allow you to just turn on the outer burners on low for smoking. Once your grill has hit about 250 degrees, and you’ve got some nice smoke going it’s time to ready the peppers.
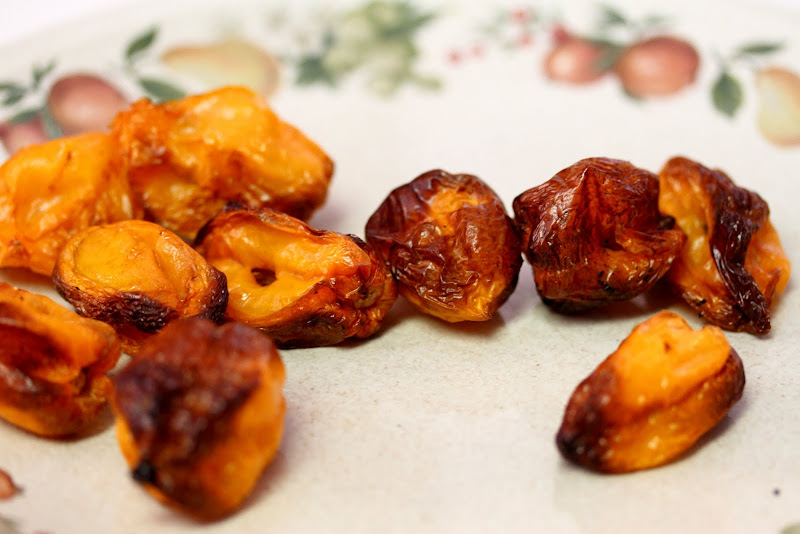
I start off with 10 ripe Habaneros. Ripe Habaneros are typically orange, but they may also have a reddish tint at the stems. Take these 10 peppers and put them on a skewer. I place them on the top rack of the grill in the center, so they’re not really exposed to flame, but they can get smoked. You’ll want to let them smoke for 30-45 minutes.
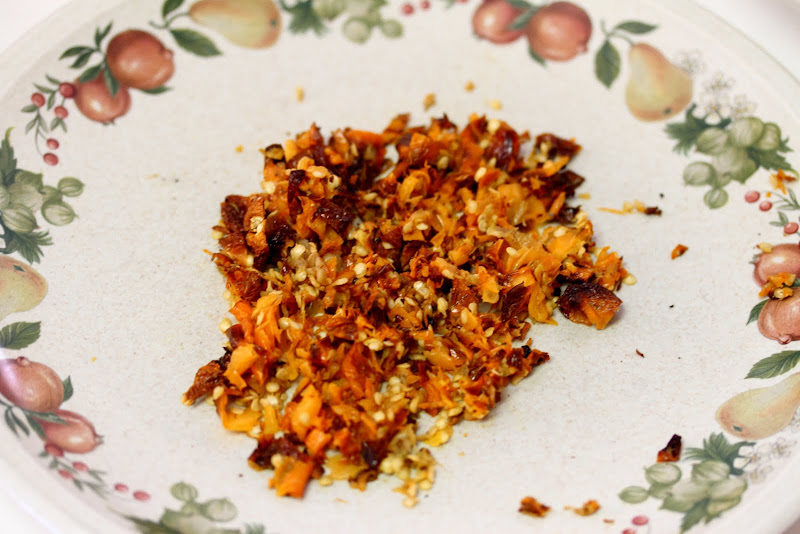
After smoking them, this is what you should have.
They should be nicely browned, and smell just a hint smoky and sweet. Chop the peppers as fine as you can get them on a glass dish. **A quick word about the kitchen items we’ll be using here… don’t used plastic cutting boards. Don’t use the food processor unless you never want to use it for anything else. The oil in the peppers will leech into the plastic, and everything you use that plastic for will be spicy.**
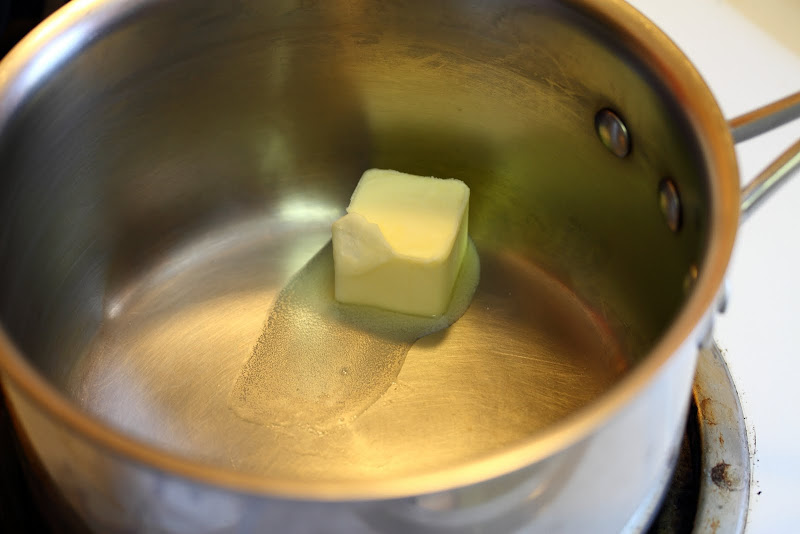
After they’re chopped up nicely (seeds included) we’re finally ready to start making the sauce. Like any good recipe, we start with butter. In this case, 2 TBSP.
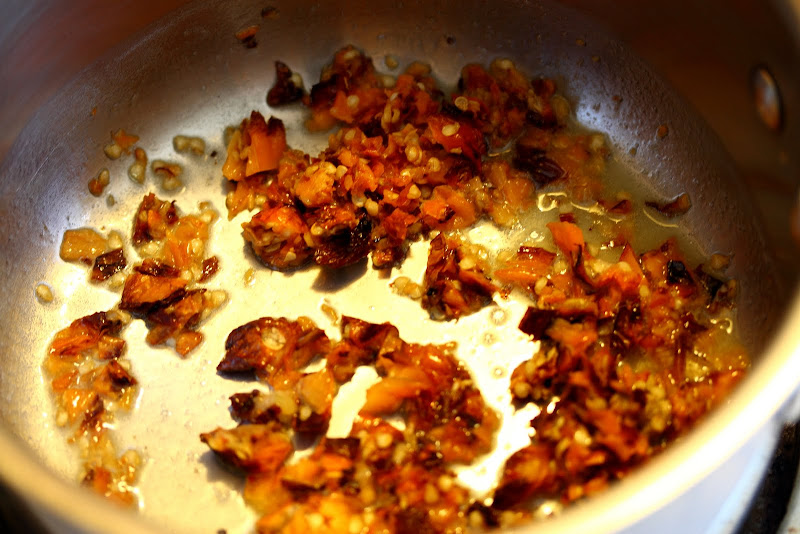
Over medium heat, melt the butter down, and then add the chopped peppers.
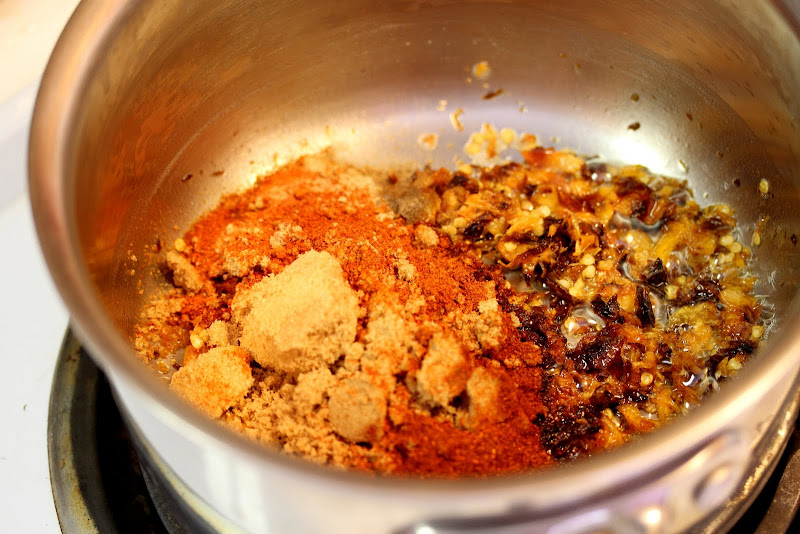
Swirl the peppers around in the butter and let them simmer for a little bit. The goal here is to create butter infused with “pain”. Meanwhile, get your dry ingredients ready.
For this size recipe, I use a 1/4 cup of brown sugar, 1 TSP Smoked Paprika, 1 TSP Cayenne Pepper, 1 TSP White Pepper, 1/4 TSP Onion Powder, 1/4 TSP Garlic Powder, and 1/4 TSP Ginger. Add all of the dry ingredients to the pot and stir it up until the brown sugar begins to melt.
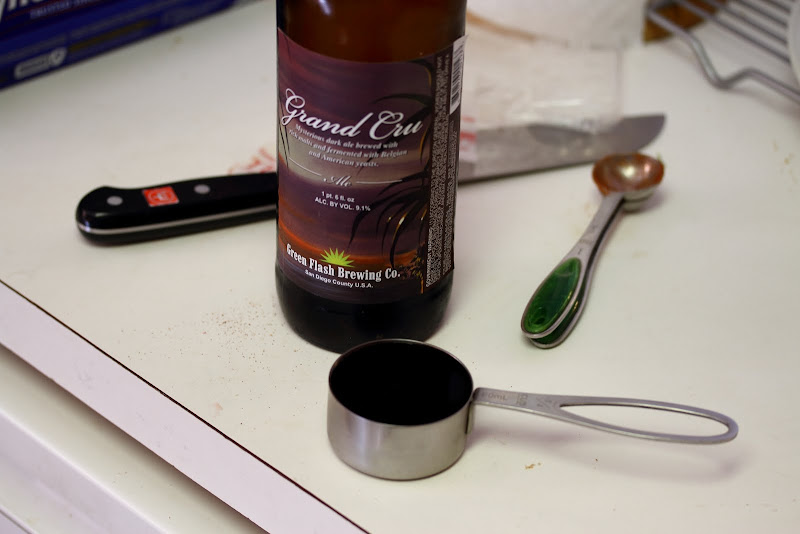
What you have after stirring should almost look like a dough, so it’s time to add some liquid. Start with 1/4 Cup of your favorite dark beer.
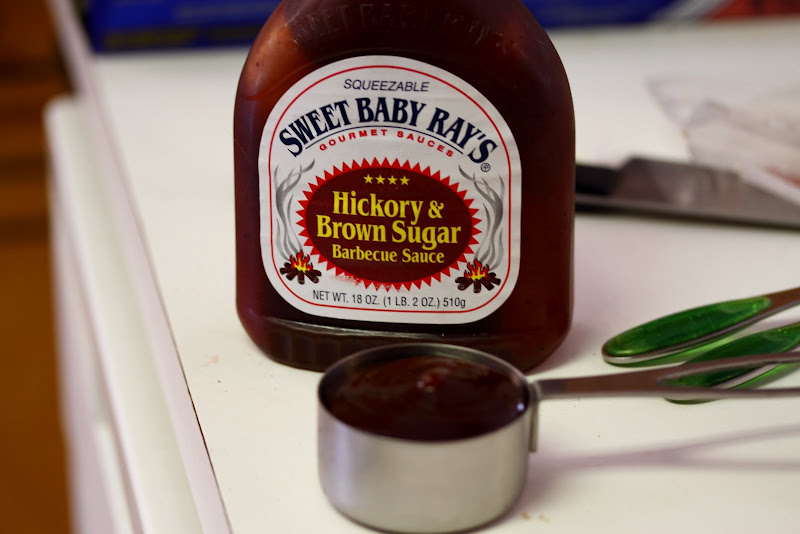
Then, 1/4 Cup of your favorite BBQ Sauce.
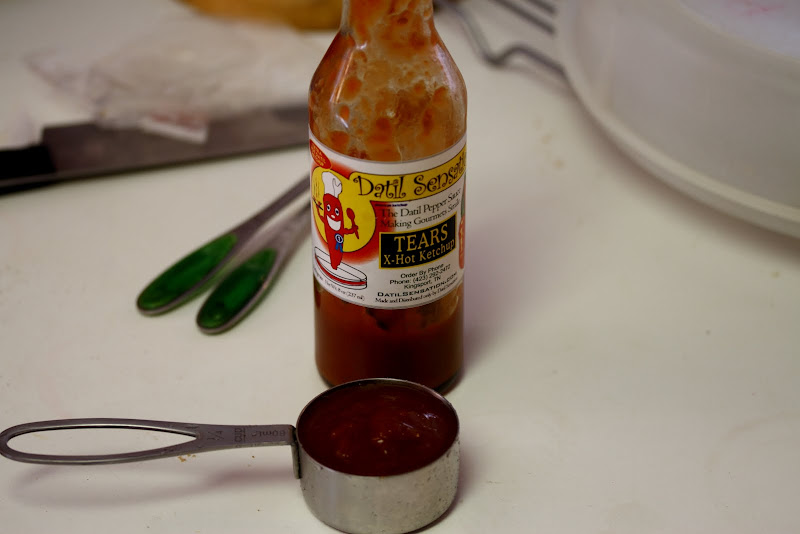
Finally, for the last bit of liquid, 1/4 Cup of your favorite Over The Counter hot sauce. I used to just use Texas Pete, but lately, I’ve been using a lot of this Datil Pepper sauce…. it’s amazing, and can be ordered online.
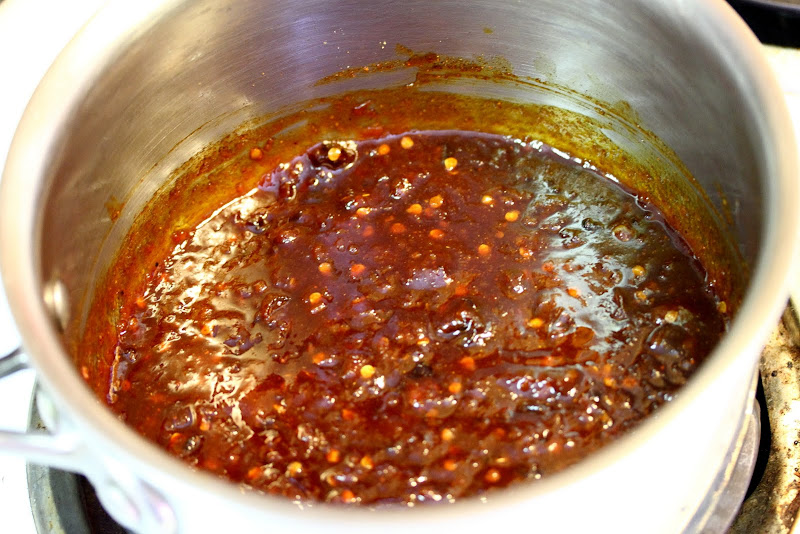
With all of the liquid in the pot, give everything a good stirring, and turn the heat down to simmer.
You want to simmer it until it hits the consistency that you want. For me, I like a nice thick sauce, and the way I prepare the wings, it’s necessary. After the desired consistency is reached, cover the pot and let it simmer for at least 1 hour, stirring it every 15 minutes or so.
For the actual wing prep, I’ll give a quick set of instructions, but won’t document it with pictures right now. You need a decent sized pot of oil. Buy cheap vegetable oil, as it’ll all be trash when you’re done cooking the wings. Get the oil to about 350 – 400 degrees and add the wings, a few at a time. You’ll want to cook them until they float, and then remove them from the oil onto a paper towel to drain. Frying the wings gives them the nice crispy skin that makes for an awesome wing. After they’re all fried up and drained, put the wings into the pot with the sauce and roll them around until they’re all covered. Put the covered wings onto a baking sheet, or I recommend a disposable aluminum pan. Put the wings into the oven at 350 degrees for about 5-10 minutes, or until the first layer of sauce is congealed onto the wings. Then, pull the wings out, switch the oven to broil, and using a silicone pastry brush or a spoon, give all of the wings another coating of the sauce. Put the tray back in the oven on broil for 2-3 minutes on each side. The goal here is to let the sugar in the sauce almost caramelize over the wings.
Just like that, you’re done. The result is a wing, that when you bite into it, you’re greeted with an explosion of moisture from the chicken’s meat. Then your mouth experiences the sweetness of the brown sugar and tangy-ness of the BBQ Sauce…. then… without warning, the Habaneros kick in. The front of your mouth is warmed by the peppers, and the tip of your tongue starts to get a bit hot…. as the heat works its way back in your mouth, the white pepper starts to have a lovely effect on the sides of your tongue… finally, you swallow, and the cayenne pepper lights up the roof of your mouth and your throat all of the way down to your stomach. … They’re really an experience that takes control of your whole mouth. Endorphins start rushing around as synapses in your brain are firing out of control trying to figure out why you’re apparently ingesting some sort of poison. In short… they’re awesome.
Just as a final warning… remember.. these aren’t for everyone. I’ve had more than one person just try these wings and then turn and ask “What the hell is wrong with you?” … So… try them out if you’re an aficionado of blazing hot wings. If you like them, let me know. If you’re cursing me and my family name from the restroom the next morning… well… I warned you.