About the cooking blog...

We enjoy a good meal. 99 out of 100 times, this good meal takes place in our kitchen. We don't eat out very often, and when we do, we're rarely "wow-ed" by the food we get. The following are recipes that have passed through our kitchen. They're not always winners, but we'll tell you if they're not, and what should be changed to make them better. Enjoy!

Monday, January 28, 2013

Chicken Enchiladas!

We're just going to jump straight into this one...


Ingredients

  • 2 Tablespoons Olive Oil
  • 1 whole Small Onion, Diced Small
  • ½ whole (red, Green Or Orange) Bell Pepper, Diced Small
  • 2 cloves Fresh Garlic, Peeled And Minced
  • ¼ cups All-purpose Flour
  • 1 teaspoon Cumin
  • 1 Tablespoon Minced Chipotle Peppers In Adobo Sauce
  • 1-½ cup Low Sodium Chicken Broth
  • ¼ cups Water
  • 1 Tablespoon Adobo Sauce (optional)
  • ¾ teaspoons Kosher Salt
  • ⅛ teaspoons Black Pepper, More Or Less To Taste
  • 2 whole Grilled Chicken Breasts, Shredded In A Large Bowl
  • 8 whole Whole-wheat Tortillas
  • ½ cups Grated Muenster Cheese
  • Your Favorite Enchilada Toppings, For Serving: Salsa, Sour Cream, Chopped Fresh Cilantro, Etc
So, season your chicken breasts with some salt and pepper, and toss them on the grill.


When it is awesomely done... pull it off and let it cool down a little bit.
While it's cooling... cut up an onion or two if they're small, and some bell pepper.


Toss the onions and peppers in a pan with a drizzle of oil, and let them sweat down for a little bit... you want the peppers to soften up, and the onions to get translucent.

Now, you can shred up your chicken.....


The easiest way to do it is with a couple of forks..... or a fork and a knife.
Now that your peppers have softened up, and your onions are translucent... add some garlic...
and you can add your Adobo sauce and minced Chipotle peppers, and salt and pepper.
Now, measure out your chicken stock and water.. and your cumin and flour...


Gradually whisk your flour and cumin into the liquid... then pour it all into the pan with the veggies.

Oh... if you buy the same peppers in Adobo sauce that I did, they're not minced. They're whole peppers.


So... cut those up before you put them in.

After the sauce has thickened up, pull it off of the heat and toss a cup of it with your chicken.


Toss until your chicken is covered, then load a bit of chicken into each of your tortillas.

Then, put down a layer of sauce in a 9x13, and put your rolled tortillas seam down on the layer of sauce. After you've filled the 9x13, dump the rest of your sauce on top and spread it out.

Now, just toss some Muenster on top, and put it in the oven at 400 degrees for about 15 minutes... since everything is cooked, you just need to get your cheese melty.

And boom goes the dynamite. It's done.
Now, scoop one out, top with whatever you like on your enchiladas, and chow down like you haven't eaten in 3 days.


This ended up a little bit spicy... not too bad... but some folks may want to use less chipotle peppers or adobo.... or... I dunno... you may just want to actually measure, instead of shaking some out of the can and saying "Yeah, that'll do."  These were pretty tasty, and they're healthier than a lot of the more traditional enchiladas with that heavy cheese sauce. ... so.. yeah... look at us go... making something healthy.

'Tater Skins.

I tend to spend a good bit of time browsing the interwebs looking for good recipes, and while looking around this weekend, one recipe kept popping up. Perhaps it is because of the impending Super Bowl thingie... but a recipe for Potato Skins stuffed with Beef, Bacon, and Blue Cheese kept popping up... So.. I figured I'd give it a shot.

First off, you need some potatoes. About 4 of them should be good. Stab them repeatedly with a fork and put them on a cookie sheet.
Preheat the oven to 400 degrees, then toss the taters in for about an hour.
When they're done, let them cool down for a little bit, then cut them in half. Remember, you're making 'tater skins...  so I picked potatoes that were a bit of a flattened circle, rather than really round. If you have potatoes that are large and round, you may have to cut a section of potato out of the center to leave "canoes" of potato about 1/2" high on either side.
 Now, grab a spoon and scoop out the guts, leaving about 1/4" of potato in the skins...

After you've got them scooped out, save the innards for use later.....in another recipe.

Now, brush the skins inside and out with some softened butter... and toss them in the oven under the broilerjust to get things browned up a little bit..

Also, toss 1/4 pound of ground beef in a pan and cook 6 slices of bacon.

And... chop up about a half cup of blue cheese...


Here's the browned skins....


and the stuff that will go inside.

This is pretty much common sense.. drop the beef, bacon and cheese in the tater skins, then toss under the broiler until the cheese gets melty.


Top with whatever you like, and you're done.

And there it is.

It was.... meh. ... Really nothing to write home about. They weren't bad... but they're tater skins... it's really not something I crave, so I'm not sure why I went through the trouble of making them. All things considered, the time that goes into them and the buying of blue cheese... ehhh... I'm not going to make them again. Now, they're not as big of a failure as say the Cincinnati Chili Lasagna I made a couple of years ago... but, they're tater skins. They are inherently dry and leathery.

The good that will come out of this is that I'll take the guts leftover from hollowing out the potatoes and make some awesome smashed potatoes with the remaining blue cheese and maybe some sour cream and bacon... and some green onions... and garlic. ... now that will be awesome. Much better than stupid potato skins.

Sunday, January 27, 2013

Meaty Meaty Meatballs!


You'll need:
1 1/4 cup whole milk
3/4 cup fine dried breadcrumbs
1 pound ground pork
1 pound ground beef, such as ground chuck
1 pound ground veal
2 1/2 teaspoons chunky kosher salt
Freshly ground black pepper
1 tsp smoked paprika
1/2 tsp cayenne
3/4 cup finely chopped Italian parsley
About 4 tbsps finely chopped fresh sage, from 2 small herb bunches
1 1/2 cups finely diced or grated yellow onion, from about 2 small yellow onions
4 large garlic cloves, finely minced or grated
2/3 cup grated Parmesan cheese
4 large eggs, beaten
Olive oil
 
I’m always up for meatballs. Always. And I’m not much of a meatball snob… I like everything from home-made three meat baked meatballs, to meatballs in a bag that have been slow-cooked in Chili Sauce and Grape Jelly…. I could go either way… the end result is usually the same.. put it on a crusty sub roll, and I’m good to go.
So without further ado… let’s get down to it.
First, dump your milk and breadcrumbs together…
Give the crumbs a stir to get them all submerged…
So… now, you’ve got 10 minutes to take care of about 30 minutes worth of work….
First, get out your meats and let them move towards room temperature for a little while…
On top is the veal. Then pork. Then beef…. I used a 85/15 beef, as you want a little bit of fat in your meatballs.
A word about the ground veal… The recipe just throws it out there, like it’s any other ingredient… like going to the store to grab some ground veal is just like grabbing a quart of milk…. In reality, the recipe might as well call for ground Bald Eagle…. It took going to several different stores to find it… the butcher at our best grocery store didn’t have it… but he told me that if I gave him several days notice, he could get it for me… he had veal cutlets… but they don’t ground their own veal… it comes in pre-ground… so.. he couldn’t even take the cutlets and grind them for me… This is the same store that carries ground bison, Capons, quail and rabbit…. because all of those are just much more normal stock items than frickin ground veal.
Anyhow… it’s time to chop all sorts of stuff… your sage, onions, parsley, etc.
Note… if you mix some of your fresh cut parsley with your paprika and salt…. you can make an Italian flag!
Toss all of your chopped stuff and spices in with your meat…
Then add the breadcrumbs/milk/eggs/everything else.
Now… mix everything up… use your hands…. get dirty and grubby with meat and awesome…. it’ll get all under your fingernails (if you have them) and all up in all of the crevices in your skin…. embrace it. love it… let the fat from the meat be your hand moisturizer.
So… now that it’s all mixed up awesomely… enlist your sous chef to roll you a bunch of 1-1/2” balls.
Preheat your oven to 350, and line a couple of baking sheets with foil. It also doesn’t hurt to spray down the foil with some olive oil….. as the balls are rolled, put them on the foil…
Then, bake for about 20-24 minutes…. you’re not looking to bake all of the way through right yet…
After they’ve baked, let them cool, and stack them up in your crockpot.
Now, smother them with sauce, and set the crockpot on low.
How long do you let them go in the crockpot?? Well… the longer they go, the softer they’ll get…. also, the more they’ll lose their individual flavors, and become one mass of awesomeness… I tried a meatball after about an hour in the sauce last night, and I wasn’t a big fan… it was very flavorful… lots of flavor from the sage and parsley… it wasn’t bad… but not my favorite either… however, I came downstairs this morning, and kicked the crockpot back on for a while… after about another hour, they were tasting pretty awesome… and had softened up nicely…. but, you don’t want to let them go too long, as you’ll end up with just meat sauce… it’ll be awesome meat sauce… but we’re making meatballs.
BAM. Here’s my breakfast from this morning…. and it was awesome… could have used a slice of provolone…but that’s an easy fix.


Sunday, January 20, 2013

Mug Cakes!

It sounds odd… and the initial thought is to call them “cup” cakes.. but someone else took that name already… for things that aren’t even made in traditional cups.

We made 5 different Mug Cakes tonight. Each of them has the same basic ingredients for the most part, so we don’t need to have a five different shots of measuring out flour, sugar, salt, baking powder, eggs, and butter.

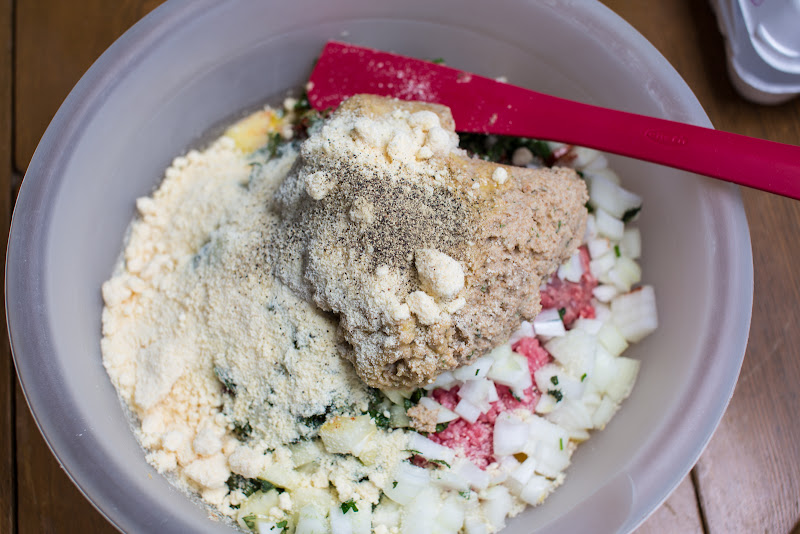
First off, we’ll do the Coffee Cake. This one might have been the most complex.


Coffee Cake in a mug

This was the favorite of the people sampling tonight… the most cake-like.

  • First, soften 1 TBSP of butter in a mug. Not melted, just softened.
  • Add 2 TBSP Sugar and mix until butter and sugar are creamed together.
  • Add 1/2 of a egg. (or a small/medium egg)
  • Add 2 TBSP Sour Cream

  • Add a few drops of vanilla (<1/8 tsp)
  • Mix in 1/4 Cup All Purpose Flour
  • Add 1/8 tsp baking powder

That takes care of the cake batter:

Now, for the crumb topping…. you need 1 TBSP softened butter, 2 TBSP Flour, 1 TBSP Brown Sugar, 1 tsp cinnamon.

Mix all of that together until it’s well incorporated.

Add the crumb topping to the top of the batter (or give it a swirl in the batter) and toss the cup in the microwave. This took 1 minute, 20 seconds… but check with a toothpick or skewer… it’s ready when it comes out clean.


Blueberry Mug Cake

This one was voted top 2 of the bunch. This was very moist and cake like.

    4 tablespoons all purpose flour
    5 tablespoons white granulated sugar
    1/2 tsp baking powder
    1 egg
    3 tablespoons milk
    3 tablespoons oil
    7-8 fresh blueberries

Directions:

Mix all ingredients except blueberries in an oversized mug until smooth. Drop in fresh blueberries. Heat in microwave for about 1 1/2 minutes. Cool for a few minutes and eat while warm.


Peanut butter Mug Cake

Ingredients:

4 tablespoons all purpose flour
4 tablespoons white granulated sugar
1/4 tsp baking powder
1 egg
3 tablespoons peanut butter
3 tablespoons milk
3 tablespoons vegetable oil

 
Directions:

Combine all ingredients in an oversized coffee mug. Whisk well with a small whisk until smooth. Microwave on high for 1 1/2 minutes and then take it out to check to see if it is done. If not, continue to microwave in thirty second intervals. Mine was done at 2 minutes. You don’t want to overcook it or it will become rubbery. You can also make this into two smaller-sized mugs. You can mix the batter all in one mug and then pour half into another mug. Make sure you cook each one individually.

So.. this one got a little tall in the microwave… and broke…. So I picked it up, popped it back on top, and finished cooking it.


Strawberries and Cream Mug Cake

1 egg

2 tablespoons strawberry yogurt, well stirred

1 tablespoon vegetable oil

1/8 teaspoon baking powder

1/8 teaspoon vanilla extract

4 tablespoons granulated sugar

5 tablespoons all-purpose flour

1/4 cup fresh sliced strawberries and whipped cream for serving

1. Coat the inside of the mug lightly with cooking spray and set aside.

2. Mix the egg, yogurt, vegetable oil, baking powder, extract, sugar and flour in a small bowl until completely smooth.

3. Fill the mug to halfway full and place it in the microwave. Bake it for 3 to 4 minutes, or until a cake tester comes out clean. Top with strawberries and whipped cream and serve.


Chocolate-Chocolate-Chocolate-Chip Mug Cake

Ingredients
  • 1 - Coffee Mug
  • 4 - tablespoons flour......(that's plain flour, not self-rising)
  • 4 - tablespoons sugar
  • 2 - tablespoons baking cocoa
  • 1 - egg
  • 3 - tablespoons milk
  • 3 - tablespoons oil
  • 3 -4 - tablespoons chocolate chips
  • Small splash of vanilla extract

How to make it
  • Add dry ingredients to mug, and mix well . Add the egg and mix thoroughly.
  • Pour in the milk and oil and mix well.
  • Add the chocolate chips (if using) and vanilla, and mix again.
  • Put your mug in the microwave and cook for 2 minutes at 1000 watts. try 1/1/2 - 2 minutes first so its not so dry ok.........
  • The cake will rise over the top of the mug, but don't be alarmed!
  • Allow to cool a little, and tip out onto a plate if desired.
  • Top with ice cream and CHOW DOWN.


Some Notes

Not a damn one of these is a single serving. They all say that they are, but no-one needs to sit down and eat a coffee mug’s worth of cake.

Also, most of these make more than can fit in a traditional coffee mug. So, general rule of thumb, don’t fill the coffee mug more than 2/3 of the way. The peanut butter one got way too high, and made a mess in the microwave. You can see the residue on the outside of all of the cups.. and most of them, I did leave a good bit of room. I had the best results filling the mugs just over half-way.

Also, everyone will say “DUH” to this… but… these things are HOT when they come out of the microwave. I made a brownie one last night (not good enough to make the top 5 here) and I burnt the hell out of the roof of my mouth. Blister and all…. it was disgusting. (not the brownie.. the blister)

I served the strawberry one with yogurt and strawberries on top. Bad choice. Hot strawberry yogurt is kinda gross. Go with whipped cream, or vanilla ice cream.

The coffee cake was probably the most cake like of the bunch… but the chocolate one was pretty awesome as well… my mom didn’t like it as much, because the texture of the cake was a bit different… but that was because half of the cake was melted chocolate chips… I thought that with the ice cream, it was like a big ol brownie sundae.

The peanut butter one was decently tasty, but could use a dollop of chocolate ice cream. Then, you’d have an awesome Reeses peanut butter cup type of magic going on.

The blueberry one… well it was like a big, moist blueberry muffin… it really didn’t need anything.. and it was awesome.


So… make some cakes. They’re awesome. They’re fast. You don’t have to dirty the mixer and a handful of bowls.